How to Install an SSL Certificate in cPanel
An SSL certificate secures the connection between your website and its visitors. After SSL is installed correctly, your website can use HTTPS instead of HTTP.
- For example: http://yourdomain.com
- becomes: https://yourdomain.com
- In this tutorial, you’ll learn how to install an SSL certificate in cPanel step by step.
Step 1: Login to cPanel
- Open your cPanel login page:
- Enter your cPanel Username and Password, then click Log in.
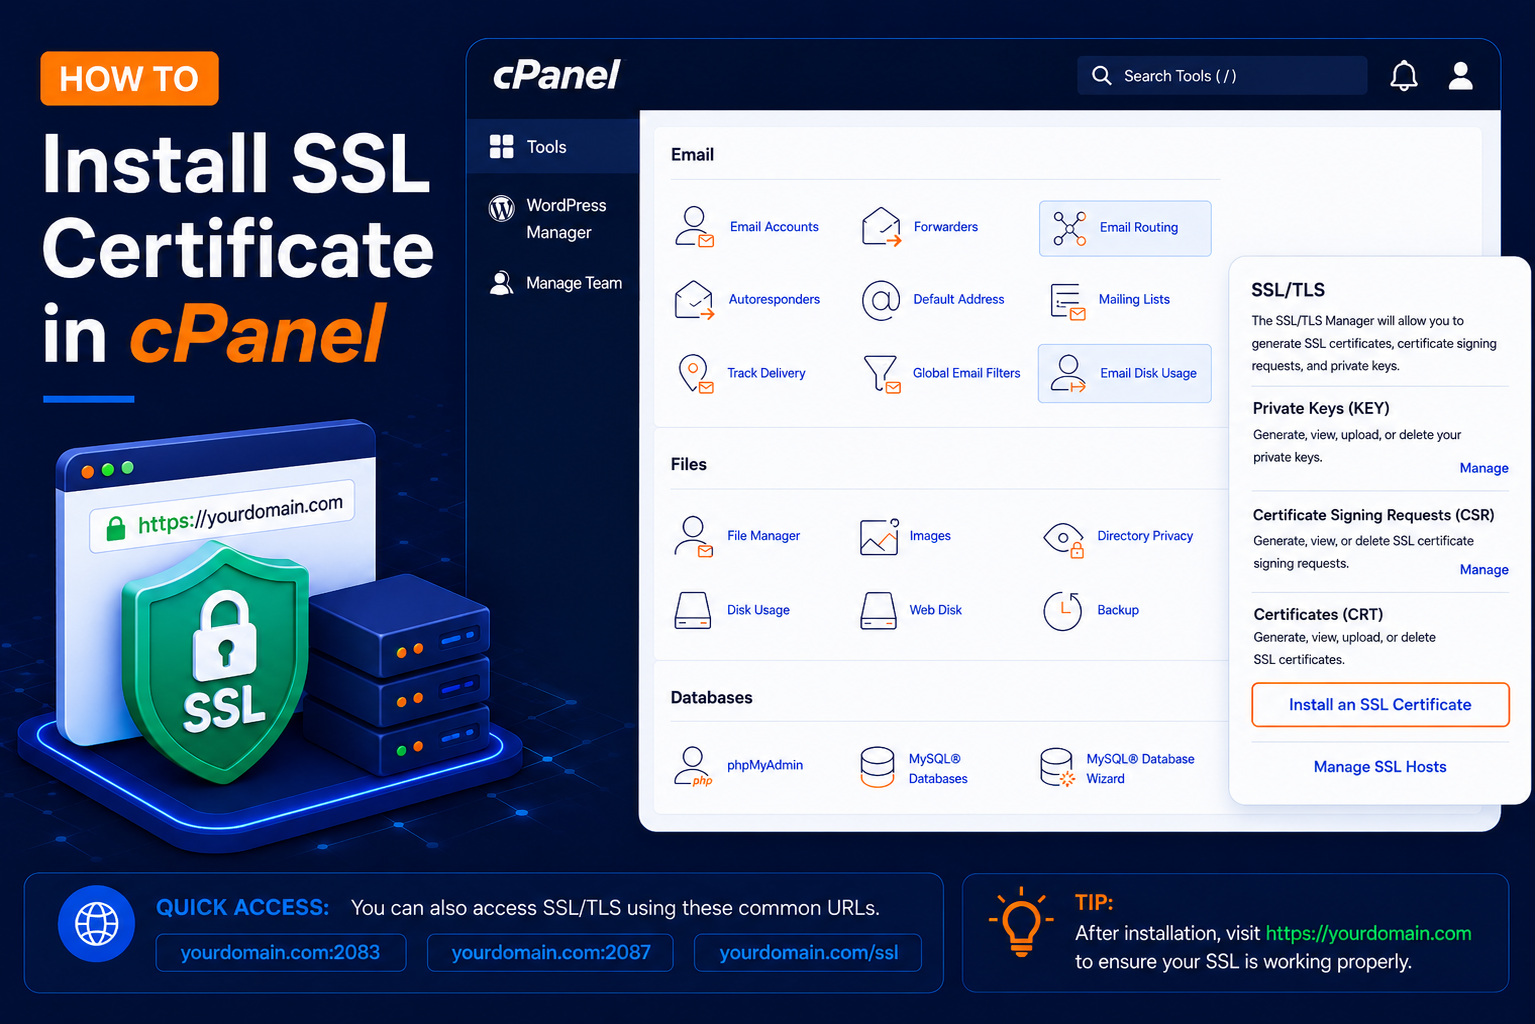
Step 2: Open SSL/TLS
- After logging in, find the Security section.
- Click: SSL/TLS
- You can also search for SSL/TLS using the cPanel search bar.
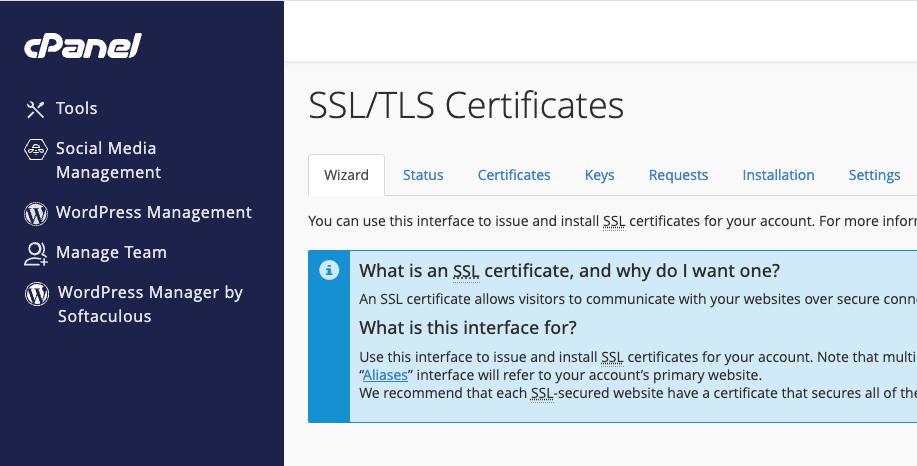
Step 7: Select Your Domain
- Choose the domain where you want to install the SSL certificate.
- For example: yourdomain.com
- Make sure you select the correct domain.
- Check the box next to the domain where you want to install the SSL certificate.
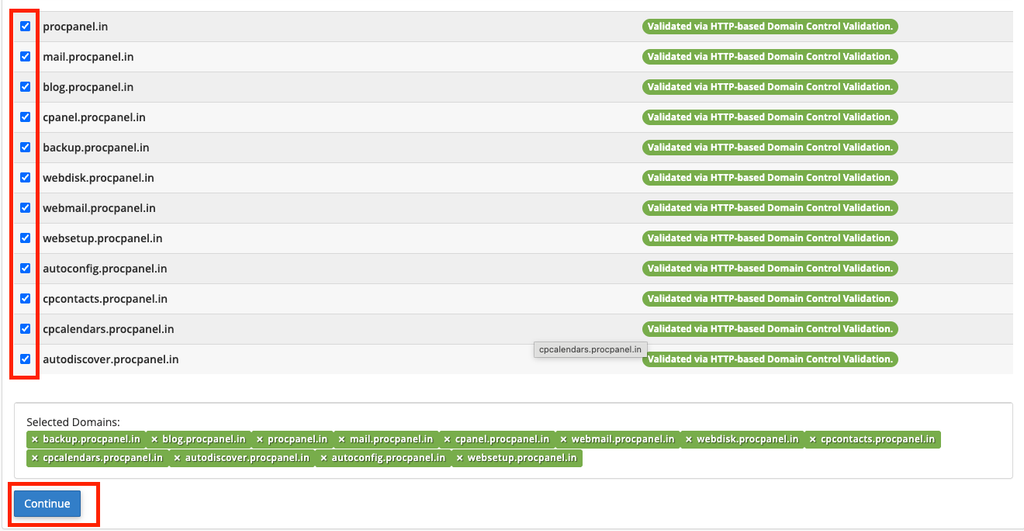
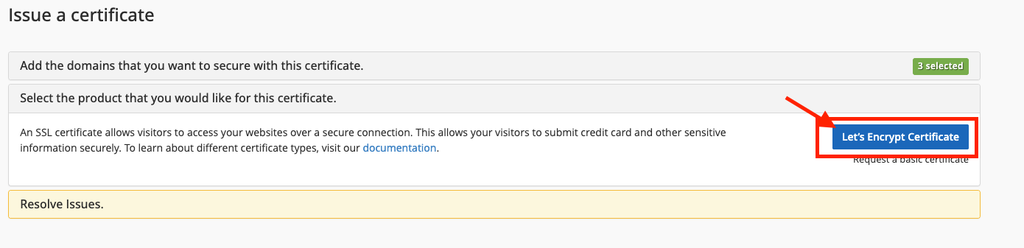
5. Then, click Continue and select Install Let’s Encrypt Certificate to complete the installation.
How to Check Whether SSL Is Working
- Open your website using : https://yourdomain.com
- Confirm that the website loads securely without certificate warnings.
- You should also verify that the certificate covers the hostname you are visiting, such as both the root domain and
wwwversion when required.